Field Studies
TOXIC SOIL REMEDIATION: JULY – SEPT 2011
ORGANIC FARM LOCATED IN ATASCADERO
Issue: Poor germination and stunted growth of corn crop suggested toxic or diseased soil.
Goal: Remediate soil by treating with vermicompost and vermicompost tea to out-compete disease carrying microbes and establish a community of beneficial microbiology with oxygen-dependent qualities.
Soil found to be fairly compacted.
SOIL TREATMENT PROGRAM:
ONE
Till under corn crop
Fracture soil with earth auger; add vermicompost to holes.
Instill vermicompost tea into soil to 18” depth
Add cover crop seed
Spray vermicompost tea over field – approx 50 gallons
TWO
Apply 50 gallons aerated vermicompost tea
THREE
Observe weak germination confirming soil disease.
Till under cover crop
Add more cover crop seed
Apply 50 gallons aerated vermicompost tea
FINAL
Establishment of healthy microbiology in soil appears to be effective. Cover crop growth strong throughout affected area. Field was left unattended over winter and planted the following spring. Crop strong with high yields.
Erica Reinheimer
6/29/17 CABBAGE
OrganiCalc Soil Analyst at Growabundant.com
This spring I tried a no-till system for the second time. Twenty five years earlier I covered a portion of our rainy Hillsboro, Oregon garden with black plastic, hoping it would be drier in the spring and allow an earlier planting. The plastic was in place about 5 months. It was partially successful – the soil was easy to fork, as there were no live plants in it. It was very wet. It had a musty smell to it I didn’t like.
In 2017 I revisited a tarped no-till method. This trial was in Arroyo Grande, California, where we got 30” of rain in the winter of 2016-2017. The tarp I used was stiff enough for airspaces beneath it, unlike the black plastic. The tarp wasn’t in place for very long; about 6 weeks was all it took to kill the weeds. I used the worst part of the garden for this experiment, an area which never amounted to much. I had done comparative soil tests and know the mineral profile of this section is as good as the more productive parts of the garden. I took the failures to be because of intense root competition from neighboring trees.
When I pulled back the tarp I was amazed to see a proliferation of earthworms. They are otherwise very rare in my garden. I scattered quite a bit of feathermeal on the surface, along with the slightest bit of borax possible, and a sprinkling of gypsum for sulfur. These anions leach easily, and often have to be replaced for every crop. The other minerals, the cations, were already in place after years of soil testing and mineralizing.
I had some extra cabbage plants, so I began transplanting them with a trowel; with just the minimum digging necessary to get the plants into the ground. The soil smelled good. As I had a bit of purchased Black Diamond vermicompost around, I dug one or two handfuls under the transplants in the top row before transplanting. I was fortunate to get the Black Diamond vermicompost; all vermicompost is not the same. Black Diamond has been chosen for the vermicompost trials at Ohio State (and small quantities are available by mail). This is a very tough test of the vermicompost; the bottom row of every bed does better than the top row.
I labeled the rows, and pretty much left them on their own until harvest. The rows got drip irrigation added about 40 days after transplanting (the ground remained quite wet after transplanting). They got weeded and mulched. Maybe kelp was foliar fed a couple times. That spring we were traveling a lot, and the garden didn’t get much care.
When I went to harvest a cabbage, the most mature and best looking one came out of the top row, the row with vermicompost. We took it to the 3 day Live Oak Music Festival where the temperatures were in the 90s. The cabbage was still very good on the third day, without any refrigeration. Quite a surprise. The top row matured earlier than the bottom row. The top (vermicompost) row yielded more.
For comparison purposes I paired cabbages from the top and bottom rows which were right below each other. In my garden not only does the bottom row grow better plants, but the plants to the left yield more than the plants to the right.
Here are photos of the paired cabbages. The cabbages with the vermicompost are on the right.
All the cabbages are a bit over-mature, though they still taste good.


Control Black Diamond Vermicompost
Pair #1 3.5 lbs 4.5 lbs
Pair #2 4.5 lbs 5.25 lbs
Observations:
The tarping/no-till method worked extremely well. I’d pretty much abandoned this part of the garden due to low yields. I’d never gotten anything like this out of this area before. When I went to plant the next crop, my 12” fork went into the soil fairly easily, then I gently rocked the fork without turning the soil. This is a vast improvement over the 5” penetration earlier. There aren’t as many roots in this area as I had thought. Maybe the problem with this bed was compaction. The no-till method seems to help compaction more than rototilling.
I was surprised how effective mixing vermicompost below transplants is. I wonder if other crops might respond even more to vermicompost. Brassicas do not form mycorrhizal associations, unlike most plants; and vermicompost is an excellent source of diverse microorganisms.
I have used this technique for some time, but this was the first time I quantified it. The cabbages with the vermicompost matured earlier and were larger.
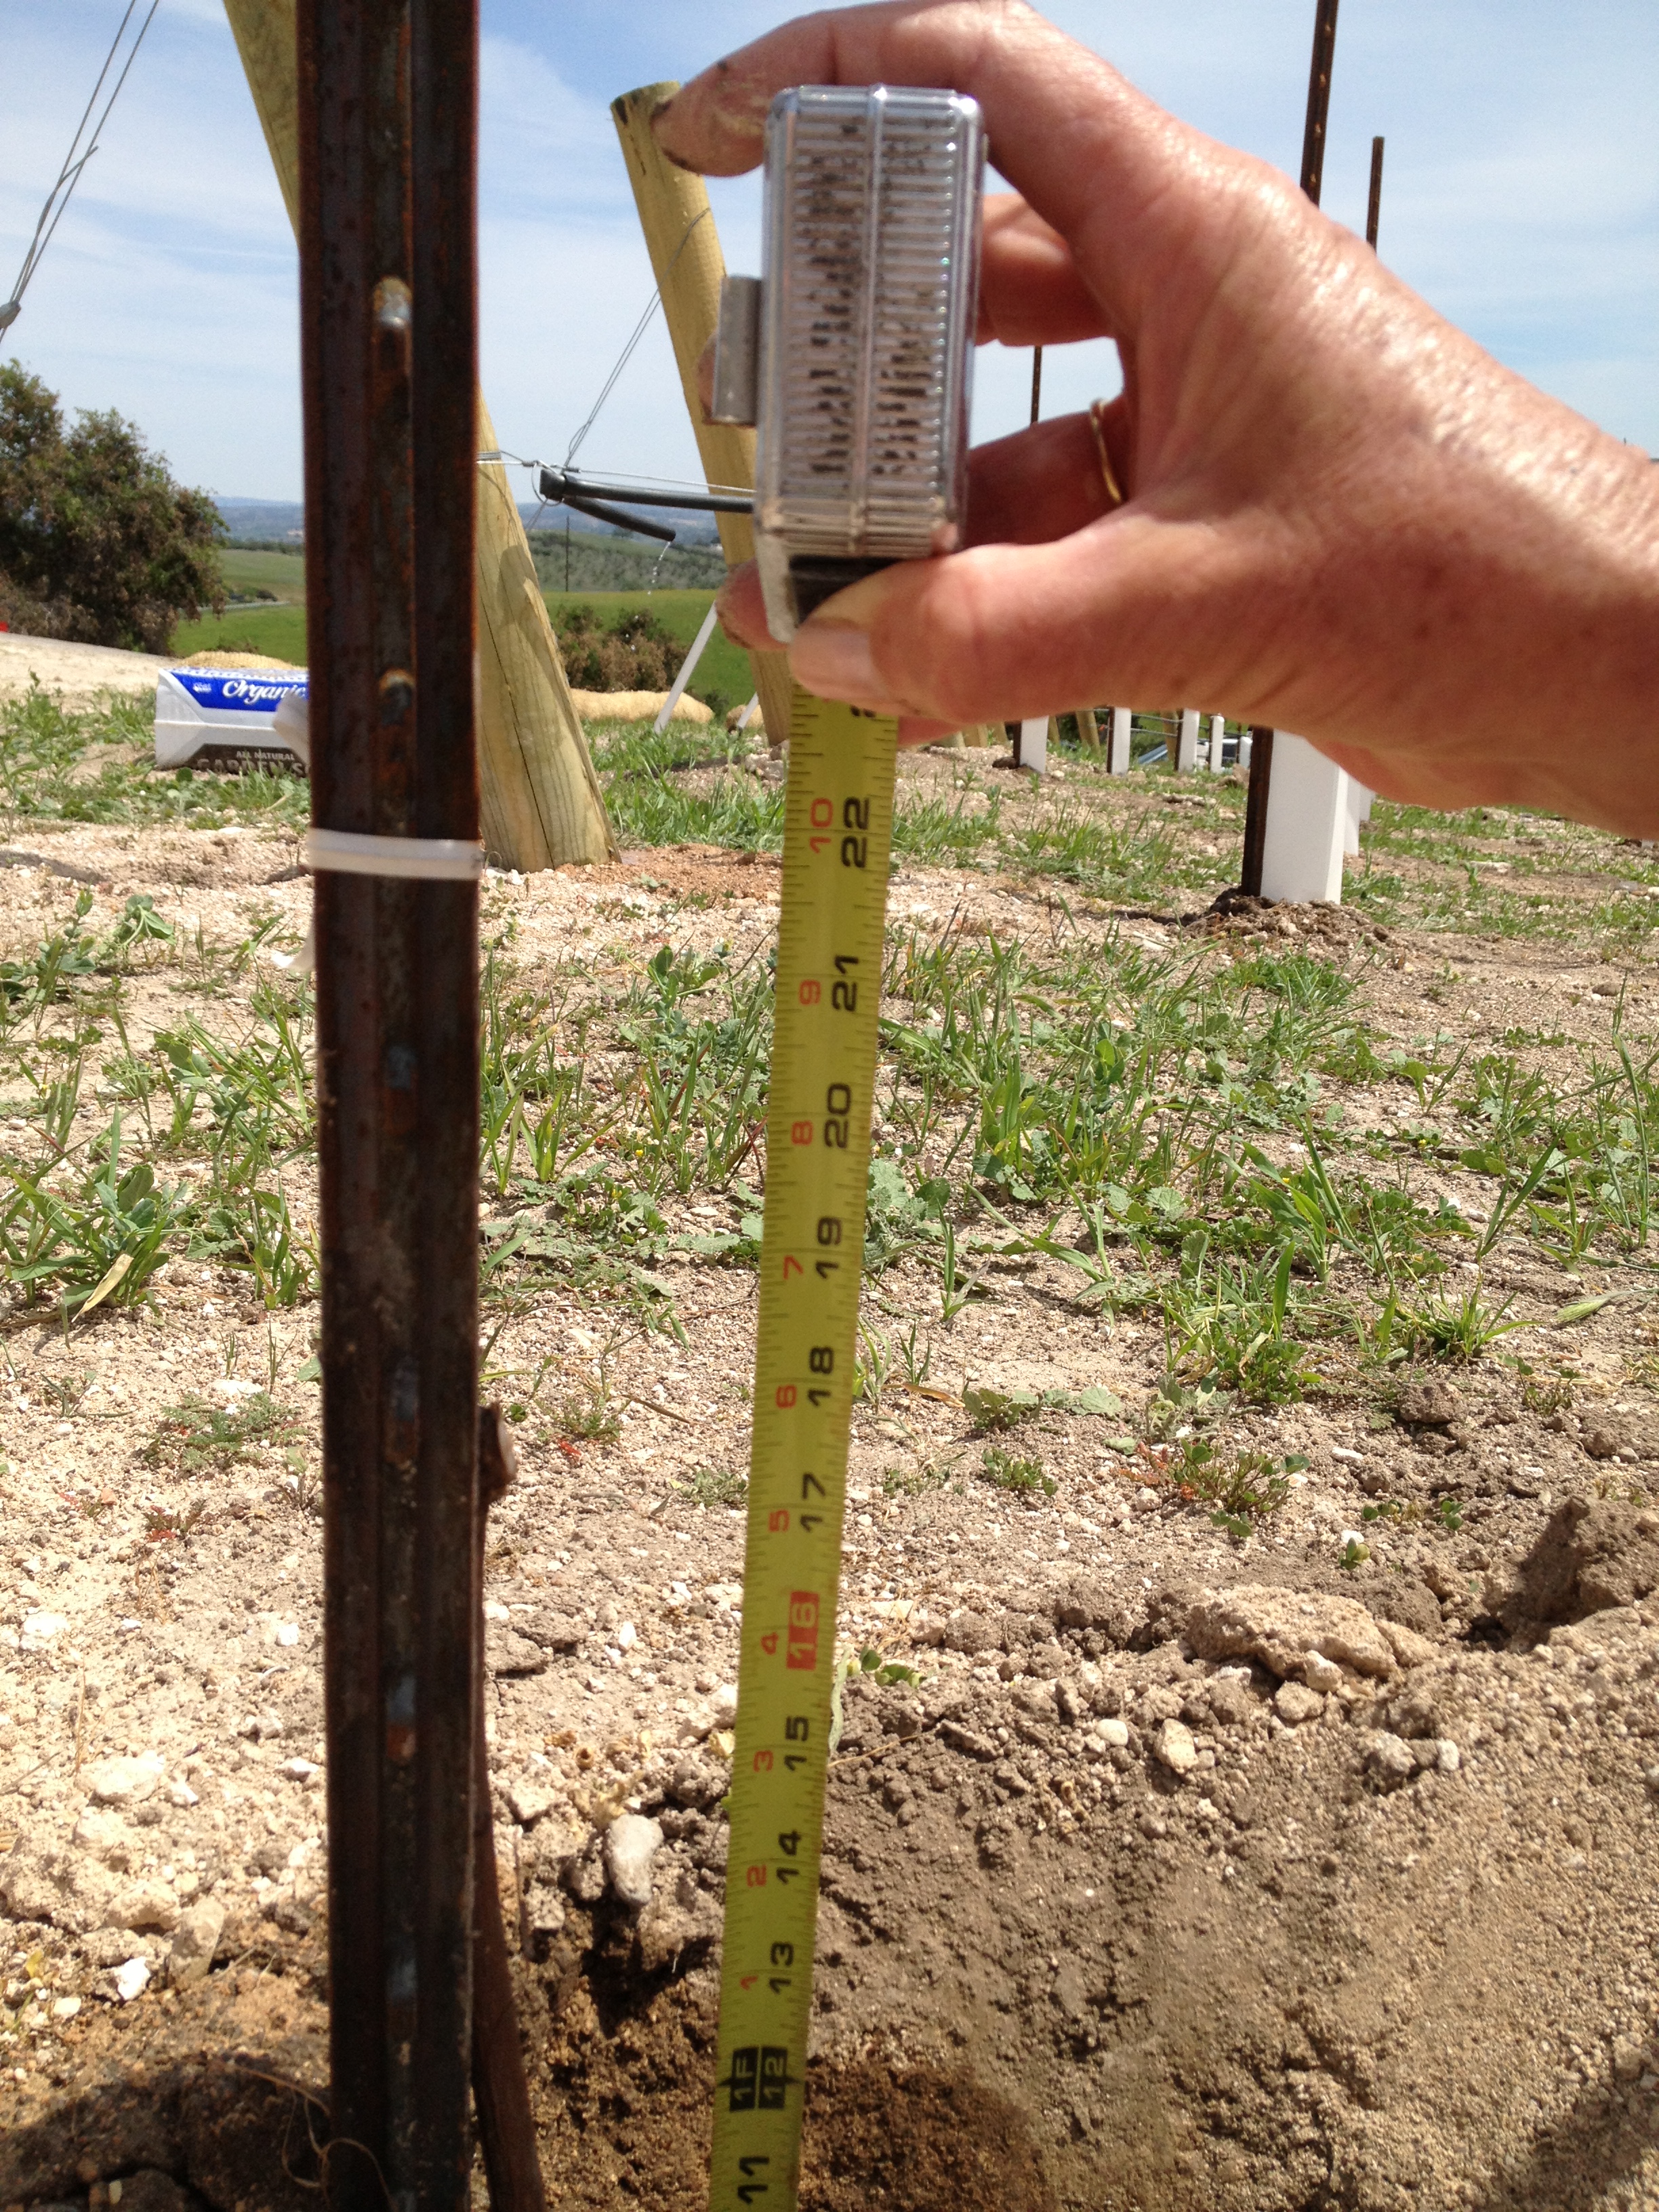
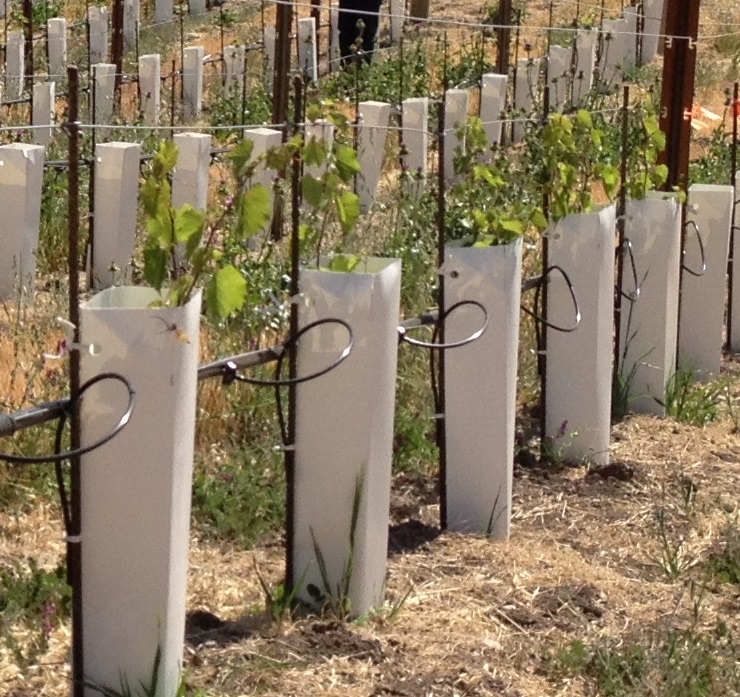
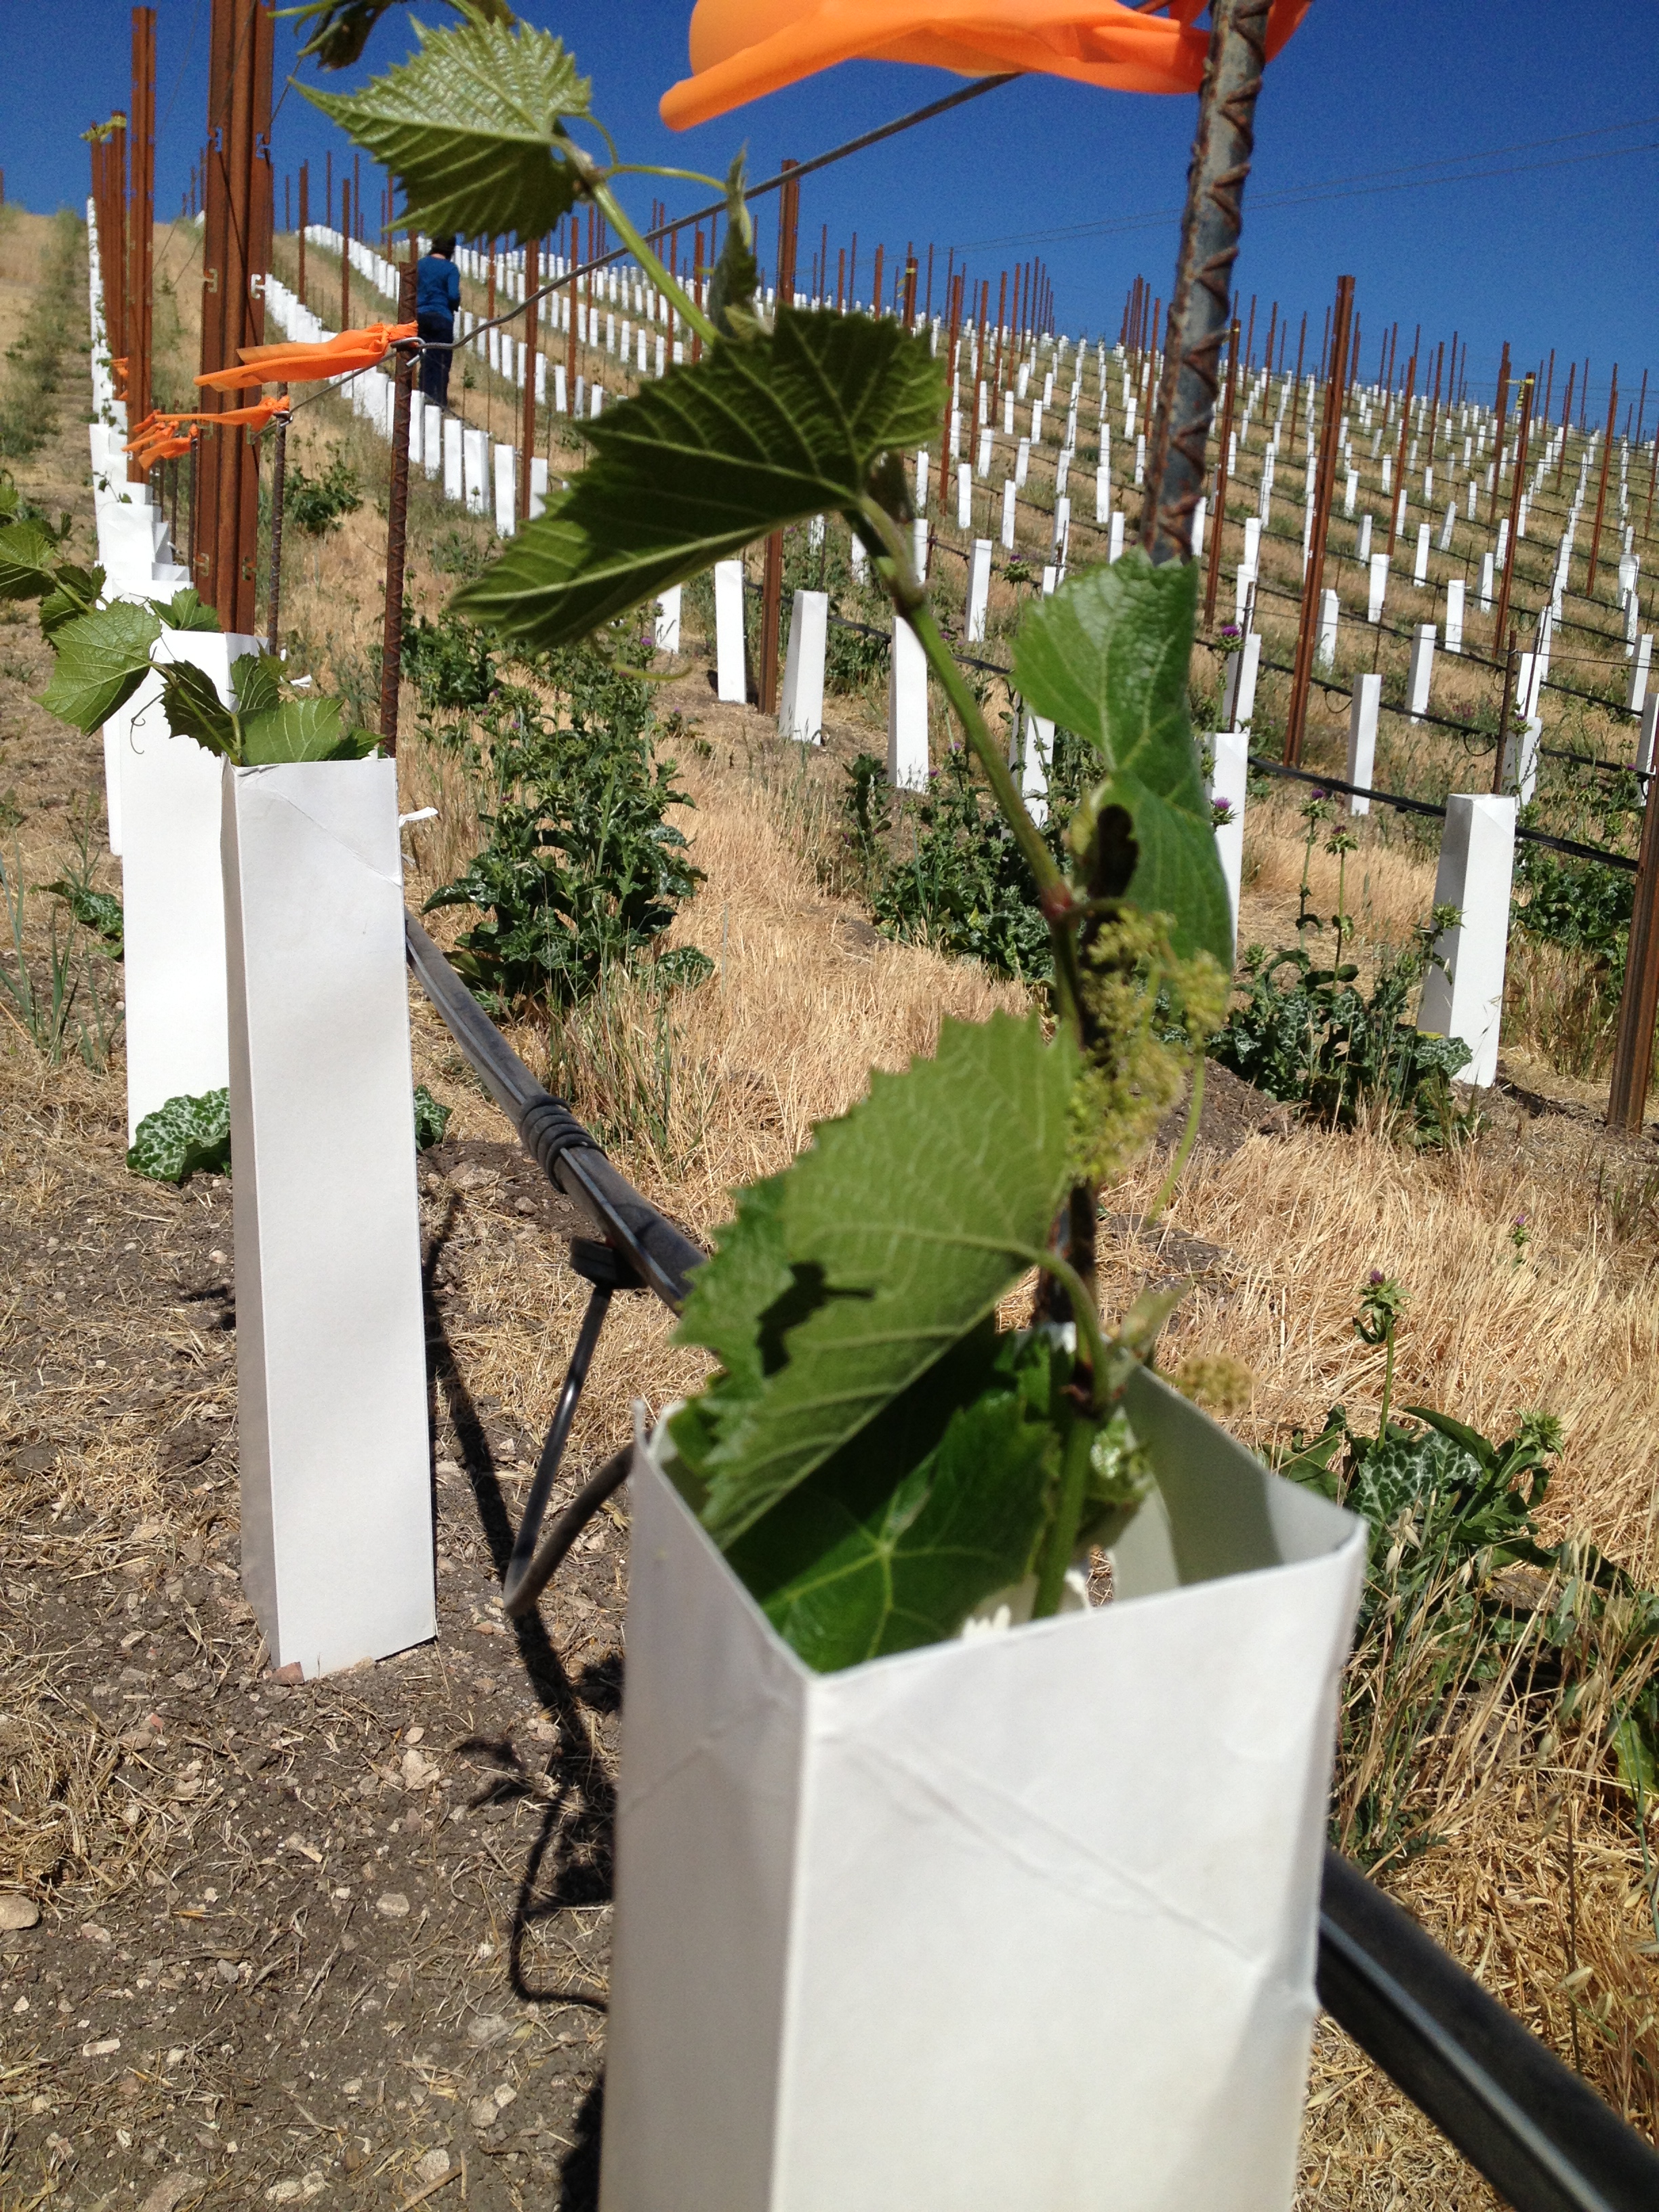
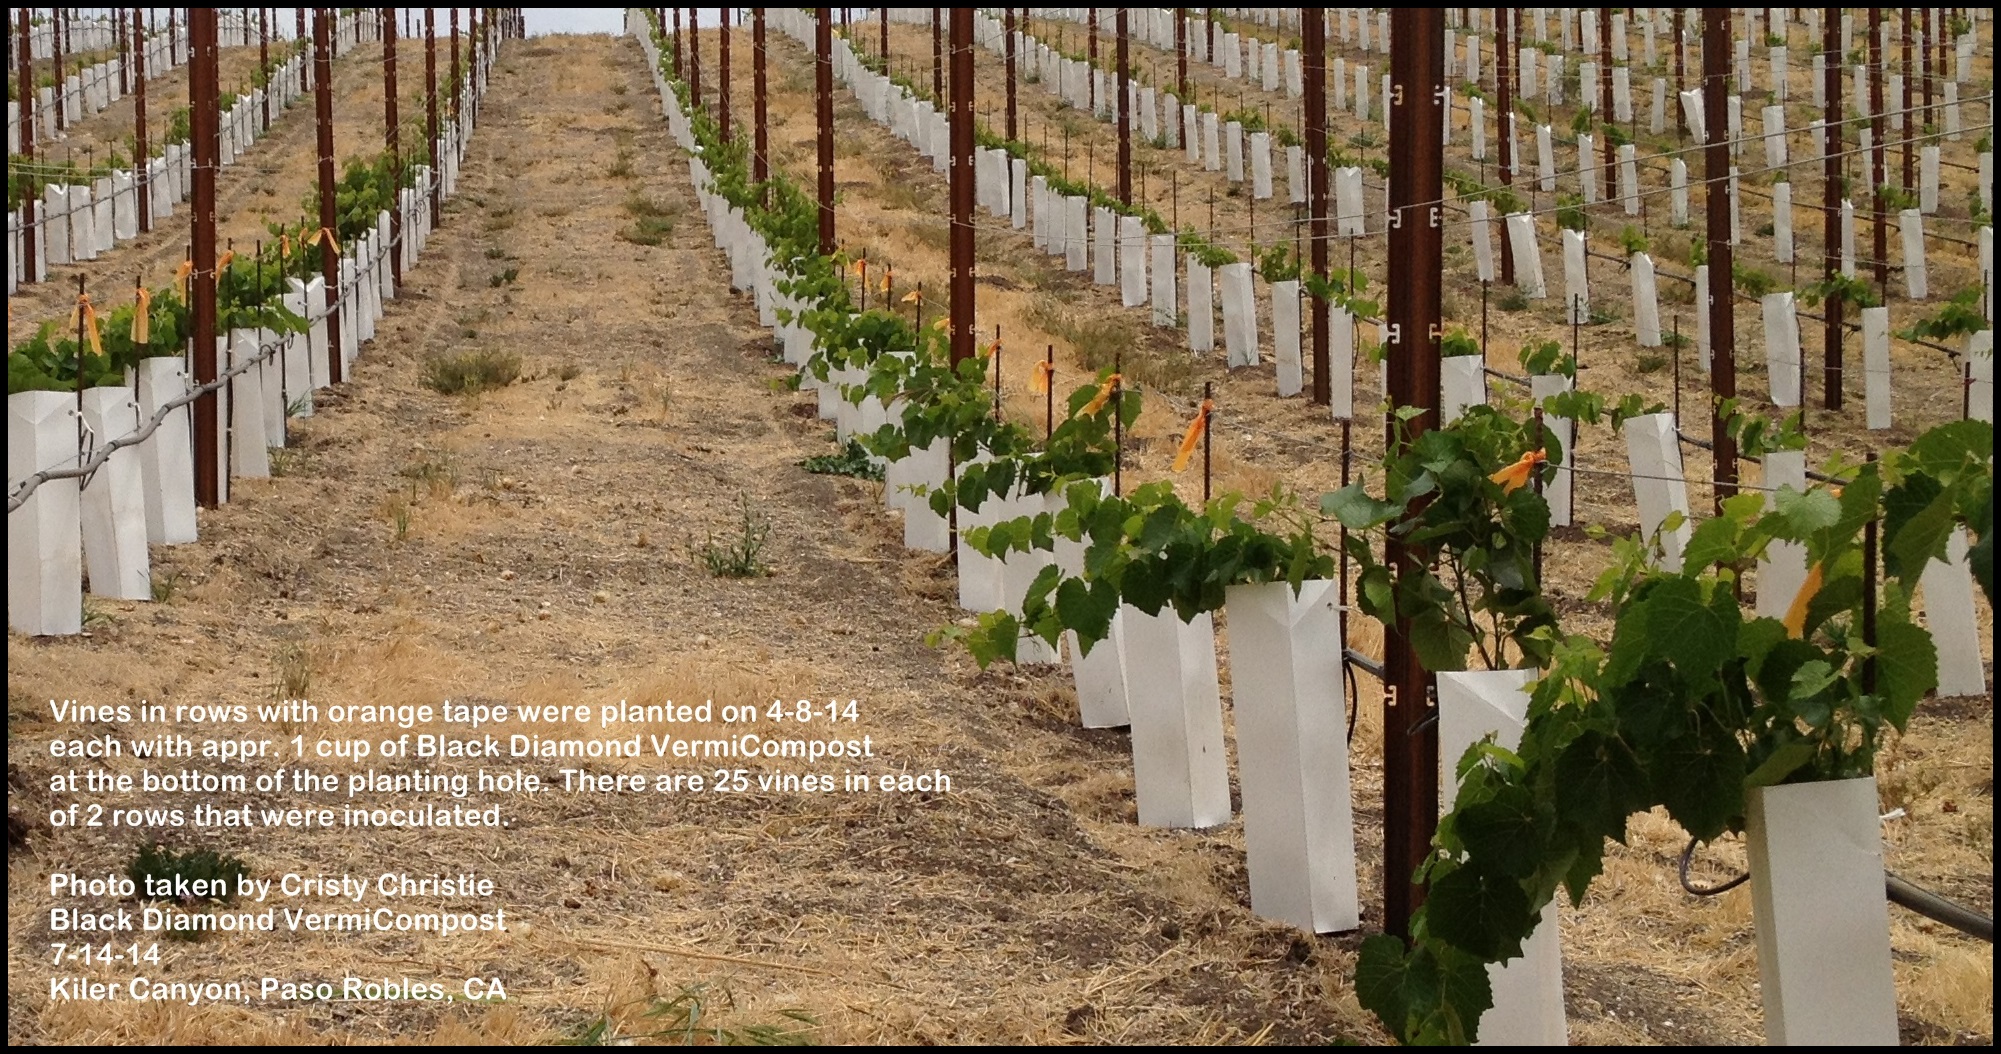
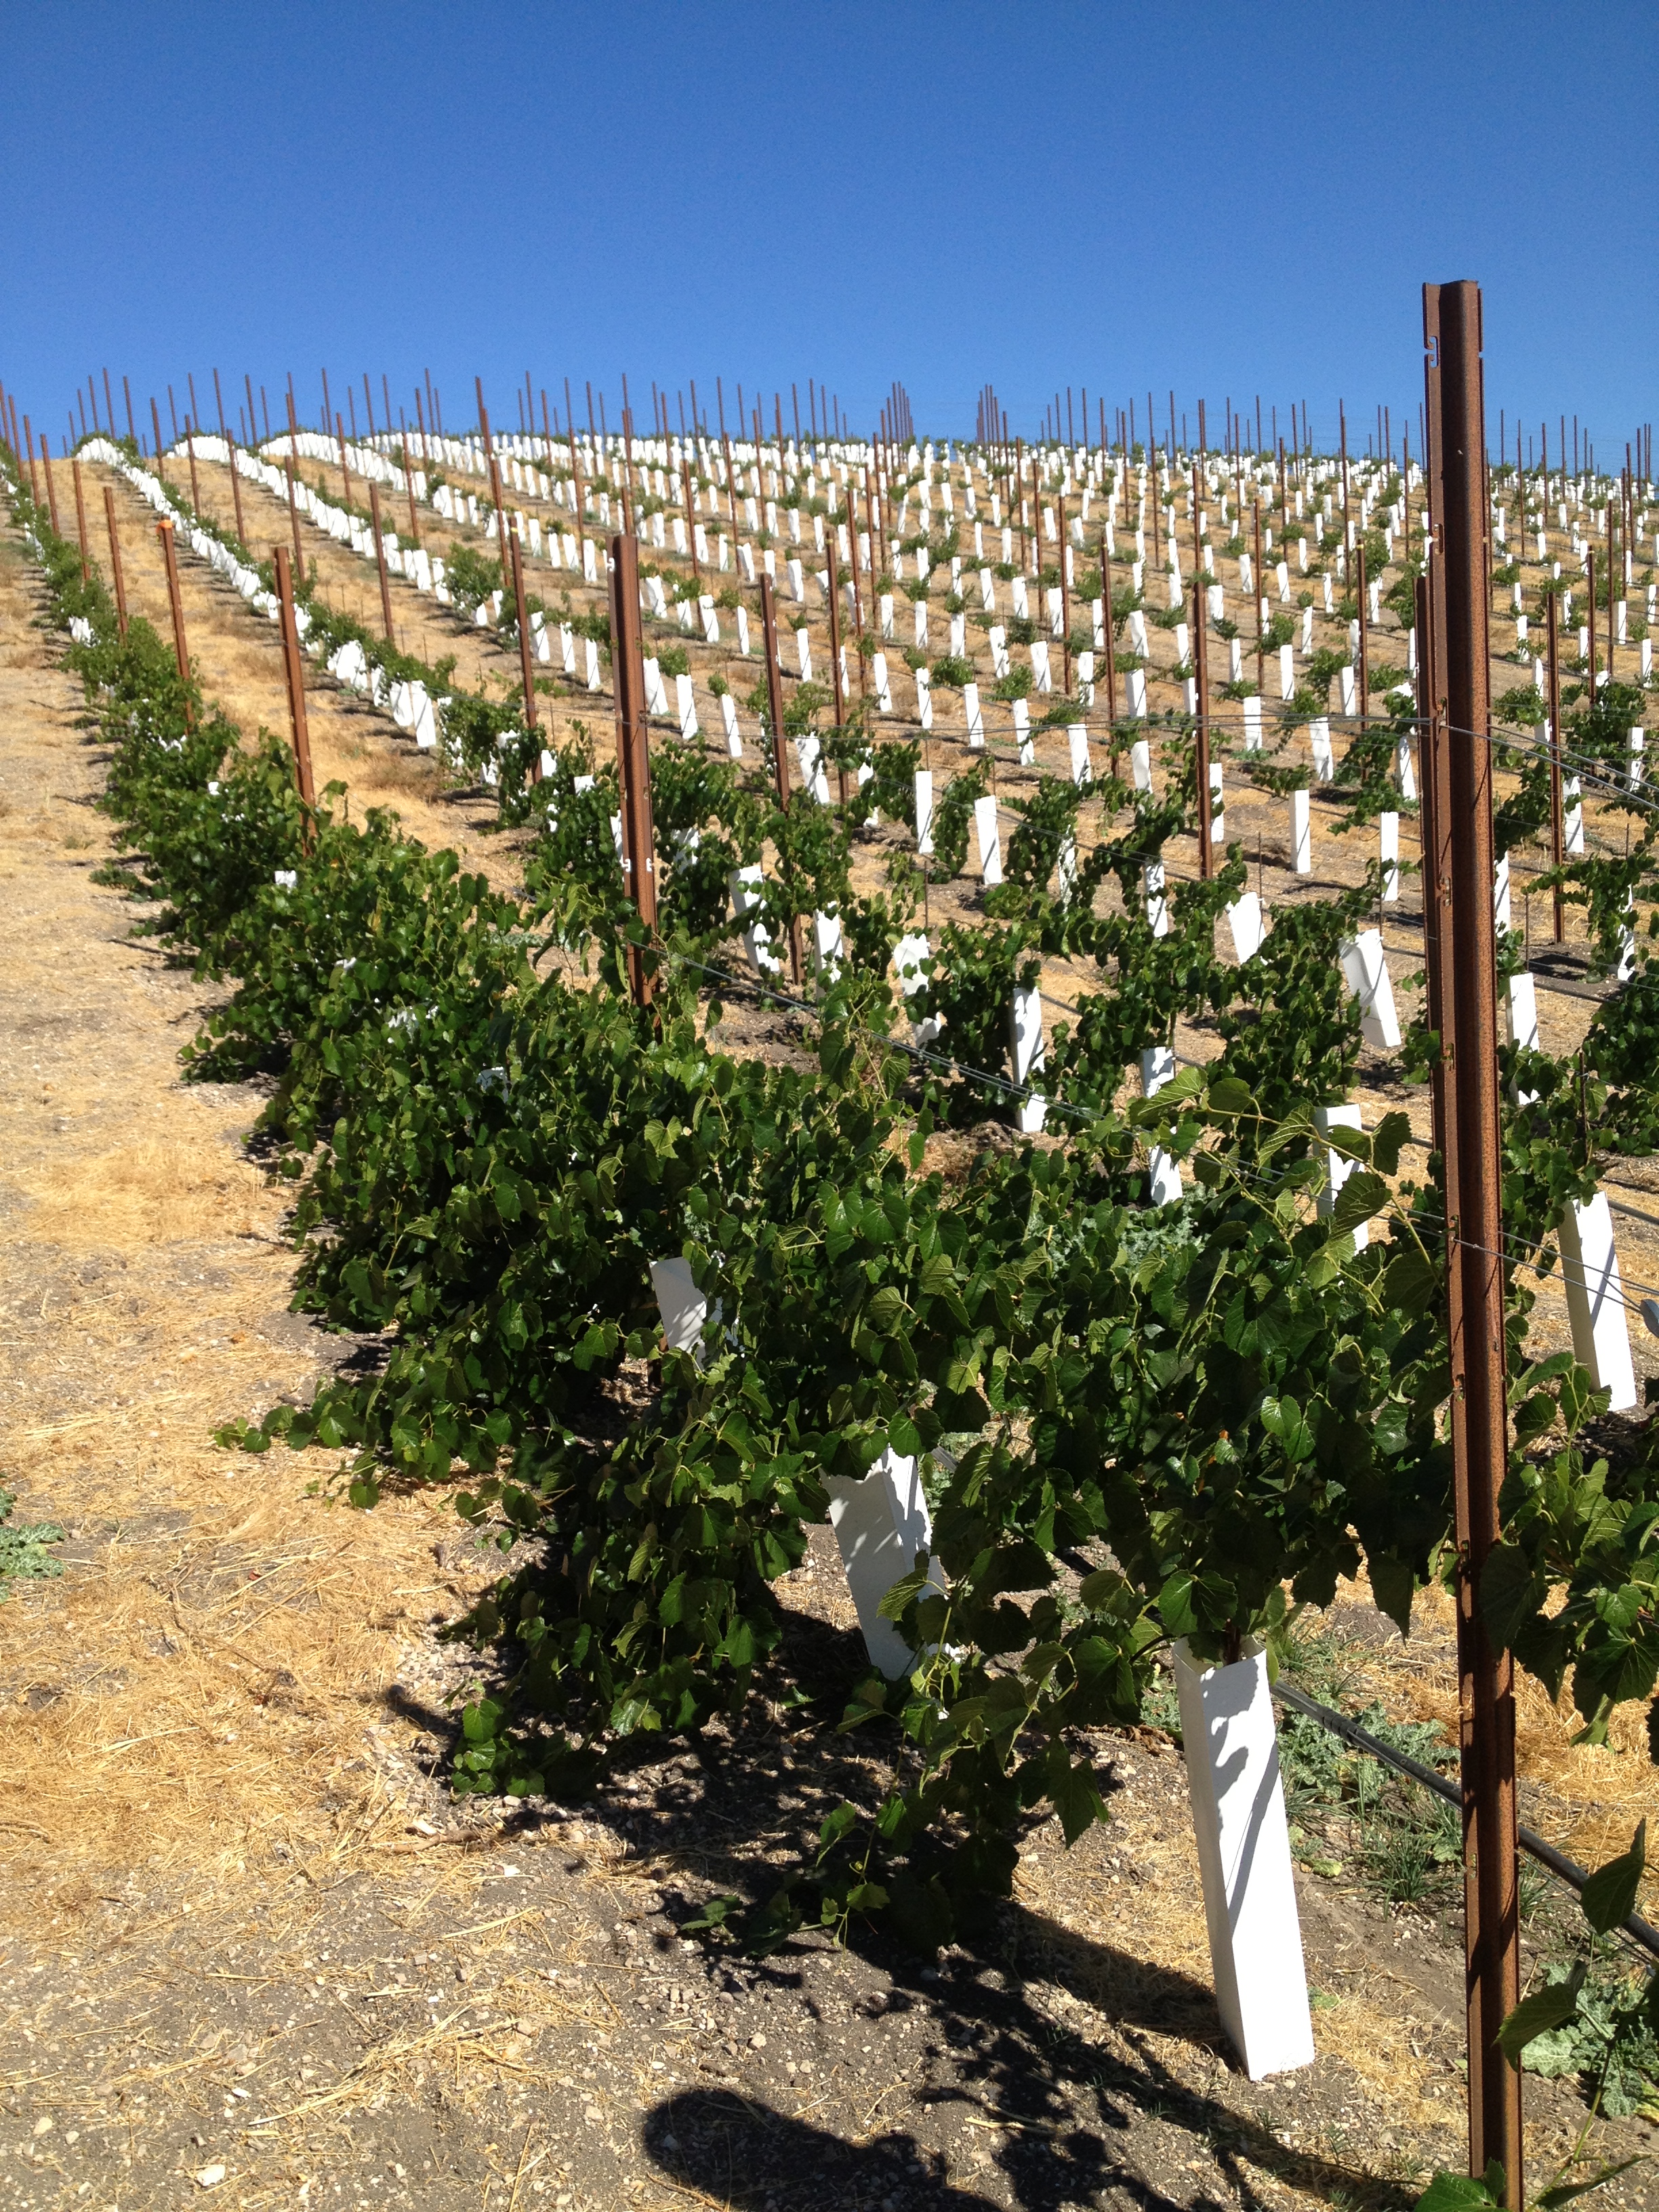
The following images are the results of using a handful of Black Diamond VermiCompost when planting new grape vines in the holes marked with orange tape. Nothing else was used. Nothing was added to the remainder of the plants per owner’s management recommendations. Planting was done in April. Proceeding photos were taken in July and September.